
Guide to Learning ios app development for beginners 2023 ?
Table of Contents
Intro
“Hey there, tech explorers! So, you’ve got this awesome idea for an iPhone app that could change the world, but there’s one tiny problem – you’re not exactly what you’d call a tech guru. No worries, we’ve got your back! We’re about to break down the whole journey of Learning ios app development for beginners to code iOS apps into simple, easy-to-follow steps. And guess what? All you need is a Mac and a dash of enthusiasm. So, grab your favorite snack and let’s dive into the world of iOS app development – the casual way!”

Your work is going to fill a large part of your life, and the only way to be truly satisfied is to do what you believe is great work. And the only way to do great work is to love what you do. If you haven't found it yet, keep looking. Don't settle. As with all matters of the heart, you'll know when you find it.
1: Get Yourself a Mac -
To create iOS apps, you need a Mac computer. Why? Apple, the creator of iOS, designed its development tools to run exclusively on macOS. You can’t use Windows or Linux for this. If you don’t own a Mac, you can consider borrowing one, buying a used one, or exploring cloud-based Mac services (though they some have limitations).
If you’re new to Macs, take some time to explore the macOS operating system. Learn how to navigate the desktop, open apps, manage files, and customize settings. You don’t need to be a Mac expert, but having basic familiarity will make your journey smoother.
2: Learn Basic Programming To start Ios development -
Before you dive into iOS app development, it’s essential to grasp the fundamentals of programming. Think of it as building a solid structure before constructing a skyscraper. Here’s how you can get started:
Choose a Beginner-Friendly Language:Start with a programming language that’s known for its simplicity and readability.
Two excellent choices for beginners are Python and JavaScript.
Online Resources for Learning:There are numerous online platforms and courses that cater to beginners. Here are a few resources for each language:
- Python.org: The official Python website provides a beginner’s guide and extensive documentation.
- Codecademy’s Python Course: Interactive Python lessons for beginners.
- MDN Web Docs: Mozilla’s comprehensive JavaScript documentation.
- freeCodeCamp: Offers a free and interactive JavaScript curriculum.
Practice Coding Basics:
Start with simple exercises and coding challenges to understand core programming concepts like:
- Variables
- Data types (integers, strings, booleans)
- Control structures (if statements, loops)
- Functions
Websites like LeetCode, HackerRank, and Codewars provide coding challenges that gradually increase in complexity.
Examples and Projects:
Learning by doing is one of the best ways to solidify your knowledge. Create simple programs or scripts to practice what you’ve learned. For instance, you can:
- Write a Python program that calculates the Fibonacci sequence.
- Create a JavaScript web page that displays a “To-Do List” where you can add and remove tasks.
Here’s a quick example in Python to illustrate the concept of variables and basic operations:
					# This is a Python comment, it's ignored by the computer
# Let's define some variables
number1 = 10
number2 = 5

# Perform basic operations
sum_result = number1 + number2
difference_result = number1 - number2
product_result = number1 * number2
division_result = number1 / number2

# Display the results
print("Sum:", sum_result)
print("Difference:", difference_result)
print("Product:", product_result)
print("Division:", division_result)

In this example, we’re using Python to perform basic mathematical operations. Variables (number1 and number2) store values, and we use operators (+, -, *, /) to perform calculations. The print function displays the results in the console.
Remember, the goal at this stage is to become comfortable with these fundamental programming concepts, which will serve as a strong foundation as you progress in iOS app development.
3: Pick a Language -
So, you’re all set to embark on your iOS app development journey. But before you dive into the coding ocean, you need to choose the right programming language. Don’t worry; we’ll make this decision a piece of cake:
Step 1: Understand Your Options
First things first, you need to know your choices. In the world of iOS app development, you primarily have two main languages to pick from:
- Swift: This is the cool kid on the block, and it’s the one we recommend for beginners. It’s easy to learn, modern, and the go-to language for most iOS projects.
- Objective-C: This one’s been around for a while and is still in use, especially in older iOS apps. It’s a bit more complex and may not be the best starting point for total newbies.
Step 2: Why Swift?
Let’s focus on Swift for this example since it’s the more beginner-friendly option.
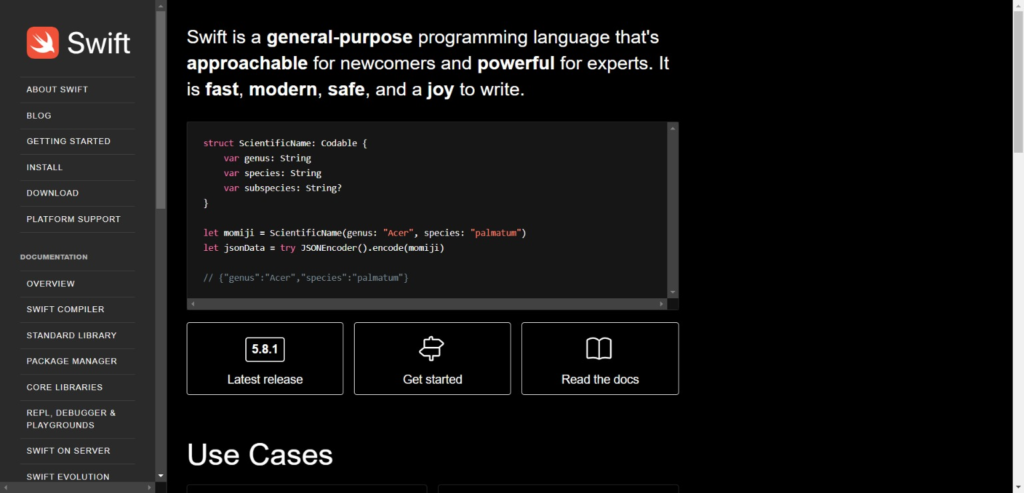
- Clean and Readable: Swift’s syntax is like a breath of fresh air. It’s designed to be clean and easy to read, which makes your coding life way more enjoyable.
- Safety First: Swift takes your code’s safety seriously. It helps you catch and prevent errors before they turn into disasters.
- Robust Community: There’s a vast community of Swift developers out there. So, if you run into a problem, chances are someone’s already solved it and shared their solution online.
- The Future: Apple is all in on Swift, so you’re on the right track if you choose it. It’s continually evolving to meet the demands of modern app development.
Step 3: Learning Swift
Now, let’s get you started on Swift with a simple example:
Variables: In Swift, you can create variables to store data. For example, you can declare a variable to store your name.
let myName = "John"
Functions: Functions are like little workers in your code. You can create one to say hello:
					func sayHello(name: String) {
    print("Hello, \(name)!")
}

// Call the function
sayHello(name: myName)
Control Flow: You can make decisions in your code using if statements:
					let age = 25

if age = 18 {
    print("You're a minor.")
} else {
    print("You're an adult.")
}
Step 4: Practice
Now that you’ve dipped your toes into Swift, it’s time to dive in and install xcode step by step guide. Practice by creating small projects, solving coding challenges, and exploring Swift’s features further. Remember, the more you practice, the more comfortable you’ll become.
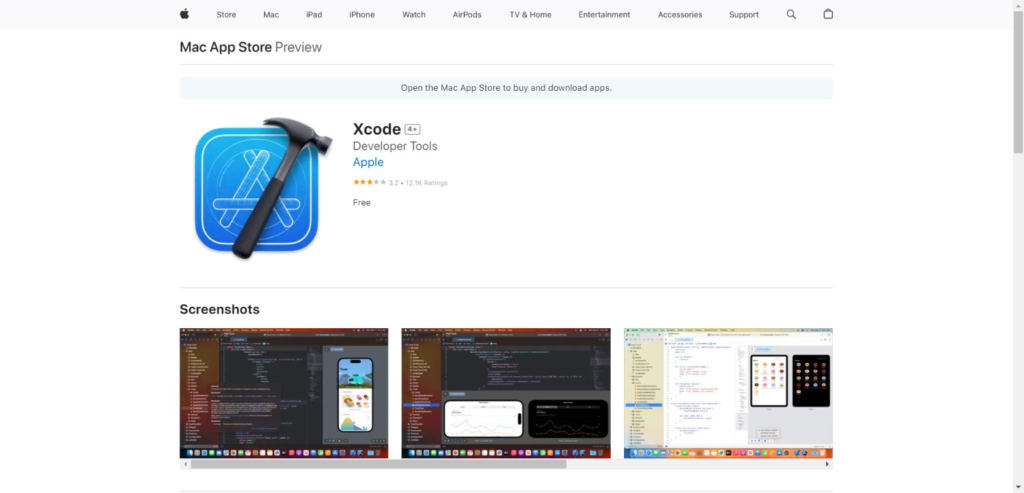
Step 1: Visit the Mac App Store
Open the App Store on your Mac. You can find it in your Applications folder or use Spotlight Search (press Cmd + Space, then type “App Store”).
Step 2: Search for Xcode
In the App Store’s search bar (top right corner), type “Xcode” and hit Enter.
Step 3: Download Xcode
You’ll see Xcode listed in the search results. Click on it.
Now, hit the “Get” button (or the cloud download icon if it’s already downloaded). Xcode is a hefty download, so it might take a bit, depending on your internet speed.
Step 4: Install Xcode
Once the download is complete, click “Install.” This will move Xcode into your Applications folder.
Step 5: Open Xcode
Find Xcode in your Applications folder and double-click it to open. The first time you run it, it might take a moment to set up some necessary components.
Step 6: Get Familiar with Xcode’s Interface
When Xcode opens, you’ll see a welcoming screen. It’s a bit like the cockpit of a spaceship, but don’t worry; you won’t need all those buttons and switches right away.
You can create a new project by selecting “Create a new Xcode project.” However, we’ll save that for later.
Example: Creating Your First Xcode Project

Let’s start simple. Imagine you want to build a “Hello, World!” app that displays a welcoming message.
- Click “Create a new Xcode project.”
- Choose “iOS App” and click “Next.”
- Give your app a name, like “HelloWorldApp,” and fill in other details as you like.
- Click “Next” until you reach the final screen, then click “Create.”
Now, Xcode opens a workspace for your app. On the left side, you see your project structure. In the middle is where you’ll design your app’s interface, and on the right is where you’ll write code.
For our simple “Hello, World!” app, you can add a label (a piece of text) to your app’s interface by dragging it from the Object Library (bottom right corner) onto the middle area (the storyboard). Double-click the label to edit the text, change it to “Hello, World!”
Next, click on the Assistant Editor button (top right corner), which looks like two overlapping circles. This brings up the code editor. You’ll see a section of code that says something like ViewController.swift. This is where you can write code to make your app do stuff.
Add this line inside the viewDidLoad function:
helloLabel.text = "Hello, World!"
Now, click the Run button (a triangle icon) at the top left of Xcode. This will build and run your app. Voilà! You’ve created and run your first iOS app. This example gives you a taste of what Xcode can do. As you continue your iOS development journey, you’ll discover its many features and capabilities to build more complex and exciting apps.
4: Learn Swift -
Now, it’s time to delve deeper into Swift. Start with Swift Playgrounds, a fun and interactive way to learn the language. Explore Apple’s Swift documentation for detailed information. Additionally, there are numerous online tutorials and courses specifically designed for Swift beginners.
iOS Basics
Let’s delve deeper into iOS Basics where you’ll understand the fundamental concepts of iOS app development. We’ll explore this step with a casual tone, practical examples, and helpful links.
Before you start crafting awesome iOS apps, it’s essential to grasp the core concepts of iOS development. It’s like learning the rules of the game before you jump into play. Here’s your roadmap:
1. UIKit Framework:
UIKit is the heart and soul of iOS app development. It provides the building blocks for creating user interfaces and managing user interactions. You’ll use UIKit elements like buttons, labels, and views to craft the visual part of your app.
Example: Imagine you want to add a button to your app that, when tapped, displays a message. UIKit allows you to create that button and define what happens when it’s tapped.
2. Interface Builder:
Interface Builder is a visual design tool integrated into Xcode. It lets you create and lay out your app’s user interface without writing tons of code. You can drag and drop elements onto your app’s screen and connect them to your code.
Example: You can use Interface Builder to design the layout of a login screen with text fields for username and password, a login button, and a logo image.
3. Model-View-Controller (MVC):
MVC is a design pattern that helps organize your code. It separates your app into three main components:
Model: Represents your app’s data and logic (e.g., a list of tasks in a to-do app).
View: Represents the user interface and how data is presented.
Controller: Acts as an intermediary, managing communication between the Model and View.
Example: In a weather app, the Model could hold weather data (temperature, conditions), the View could display this information with icons and text, and the Controller would handle user interactions like refreshing the data or switching locations.
4. Practical Learning:
Understanding these concepts is vital, but practice makes perfect. Start by creating simple iOS app prototypes. For example, try building a “Hello World” app with a button that changes text when tapped using Interface Builder and Swift code.
					import UIKit

class ViewController: UIViewController {

    @IBOutlet weak var displayLabel: UILabel!

    @IBAction func changeText(_ sender: UIButton) {
        displayLabel.text = "Hello, iOS!"
    }
}
In this Swift code example, we have a button connected to a changeText function that updates the text displayed on a label.
5: Ios app development course -
Enrolling in online courses and following tutorials can be a fantastic way to get hands-on experience and learn iOS app development. Here are some resources to help you get started:
- Udemy: iOS Development Courses on Udemy: Udemy offers a variety of iOS development courses, from beginner to advanced levels. Look for courses with good reviews to find the best fit for your learning style.
- Coursera: iOS App Development Specialization: Coursera partners with top universities and institutions to provide comprehensive iOS development courses. You can audit courses for free or earn certificates for a fee.
- edX: iOS App Development Courses on edX: edX offers iOS development courses from renowned universities and institutions. You can audit courses for free or pursue a verified certificate.
- Ray Wenderlich: Ray Wenderlich iOS Tutorials: Ray Wenderlich is a popular platform for iOS development tutorials and guides. They offer a wide range of free and paid tutorials that are beginner-friendly.
Watch this video for more inspiration:
6: Practice with Mini Projects
Start small to gain hands-on experience. Create simple iOS apps like a to-do list or a calculator. These projects will help you apply what you’ve learned and build confidence as you see your apps take shape.
7: Make it Pretty with Design Skills
Good apps not only work well but also look great. Learn about user interface (UI) and user experience (UX) design principles to create visually appealing and user-friendly apps. There are many design tutorials and tools available.
8: Join the iOS Party
Connect with the iOS development community. Join online forums, communities, and social media groups. Ask questions, share your progress, and network with fellow developers. It’s a valuable resource for learning and finding support.
Here are some online platforms and communities where you can engage with others, ask questions, and learn from experienced developers:
- Stack Overflow – iOS Tags: Stack Overflow iOS Tags: Stack Overflow is a treasure trove of programming knowledge. Check out the iOS tags to find answers to common questions and ask your own if you run into issues.
- Reddit – r/iOSProgramming: r/iOSProgramming on Reddit: Reddit’s iOSProgramming community is a great place to discuss iOS development, share experiences, and seek advice from developers at all levels.
- GitHub – iOS Repositories: GitHub iOS Repositories: GitHub is a hub for open-source iOS projects. You can explore existing projects, contribute to them, or even start your own.
- iOS Developer Forums: Apple’s Developer Forums are a valuable resource for getting help with specific iOS development topics and issues. Access them through the Apple Developer Forums.
- LinkedIn – iOS Developer Groups: LinkedIn iOS Developer Groups: LinkedIn hosts various iOS developer groups where you can connect with professionals in the field, join discussions, and learn from experienced developers.
- iOS Developer Slack Channels: Slack has several iOS development communities where you can chat with fellow developers. One example is iOS Developers on Slack.
By joining these communities and participating in discussions, you’ll not only gain insights and assistance but also build valuable connections in the iOS development world. It’s a great way to stay motivated and learn from others on this exciting journey!
9: Show Off Your Work
Build a portfolio showcasing the iOS apps you’ve created. This portfolio becomes your calling card when you want to showcase your skills to potential employers or clients.
10: Hunt Down Bugs and Test
Learn how to identify and fix issues in your apps using Xcode’s debugging tools. Testing your apps thoroughly, both on real iOS devices and simulators, ensures they work as intended and provide a smooth user experience.
11: App Store Adventure
lets discuss the prices involved in publishing apps on the App Store. Additionally, I’ll provide some helpful links for further information.
Apple Developer Program Membership:
- To publish apps on the App Store, you must enroll in the Apple Developer Program. As of my last knowledge update, the membership costs $99 per year for individuals and $299 per year for organizations. However, please check the latest pricing on the Apple Developer Program page, as fees may change over time.
In-App Purchase Fees:
- If your app offers in-app purchases (e.g., subscriptions, virtual goods), Apple takes a percentage of the transaction, typically 15% to 30%, depending on various factors. This allows you to earn revenue from your app, but a portion goes to Apple for providing the platform.
App Review Process:
- When you submit an app to the App Store, it goes through a review process by Apple’s team. There are no direct fees for this process, but it’s essential to ensure your app complies with Apple’s guidelines to avoid rejections, which can be time-consuming.
Apple Developer Tools:
- While Xcode, the primary development tool, is free to download, there may be some costs associated with third-party tools or services that you choose to use during development.
Additionally, here are some helpful links for further information:
- Apple Developer Program: The official page for the Apple Developer Program, where you can find the latest details on membership fees and benefits.
- Apple App Store Review Guidelines: Review Apple’s guidelines to ensure your app complies with their requirements before submitting it for review.
- Apple In-App Purchase Guidelines: Learn about in-app purchase guidelines, pricing tiers, and revenue-sharing details.
Remember that investing in the Apple Developer Program and complying with Apple’s policies is an essential part of the app publishing process, and it provides you with access to a massive user base through the App Store.
12: Keep Learning and Rock On
iOS development is an ever-evolving field. Stay up-to-date with the latest iOS updates, libraries, and industry trends. Continual learning is essential to keep your skills sharp and your apps competitive.
Remember, this journey is about learning and growing. Don’t be discouraged by challenges along the way. Each step builds on the previous one, and with persistence, you’ll become a proficient iOS app developer.